App Development
Guides
Software Engineering
How we build and release our Expo app with Xcode Cloud

Codse Tech
August 9, 2026
Xcode Cloud can build an Expo app for iPhone and send it to TestFlight for testing. Expo is a framework for building mobile apps. We use Xcode Cloud for Sisu, our children’s learning app, as an alternative to Expo Application Services (EAS) Build.
Both services build an app on remote computers. This gives the team a shared build environment instead of depending on the tools installed on one developer’s Mac. Xcode Cloud also puts the build and distribution settings alongside Apple’s release tools.
This guide explains our setup, the decisions behind it, and the problems we encountered. The implementation steps are for developers who already have an Expo app and access to its Apple developer account.
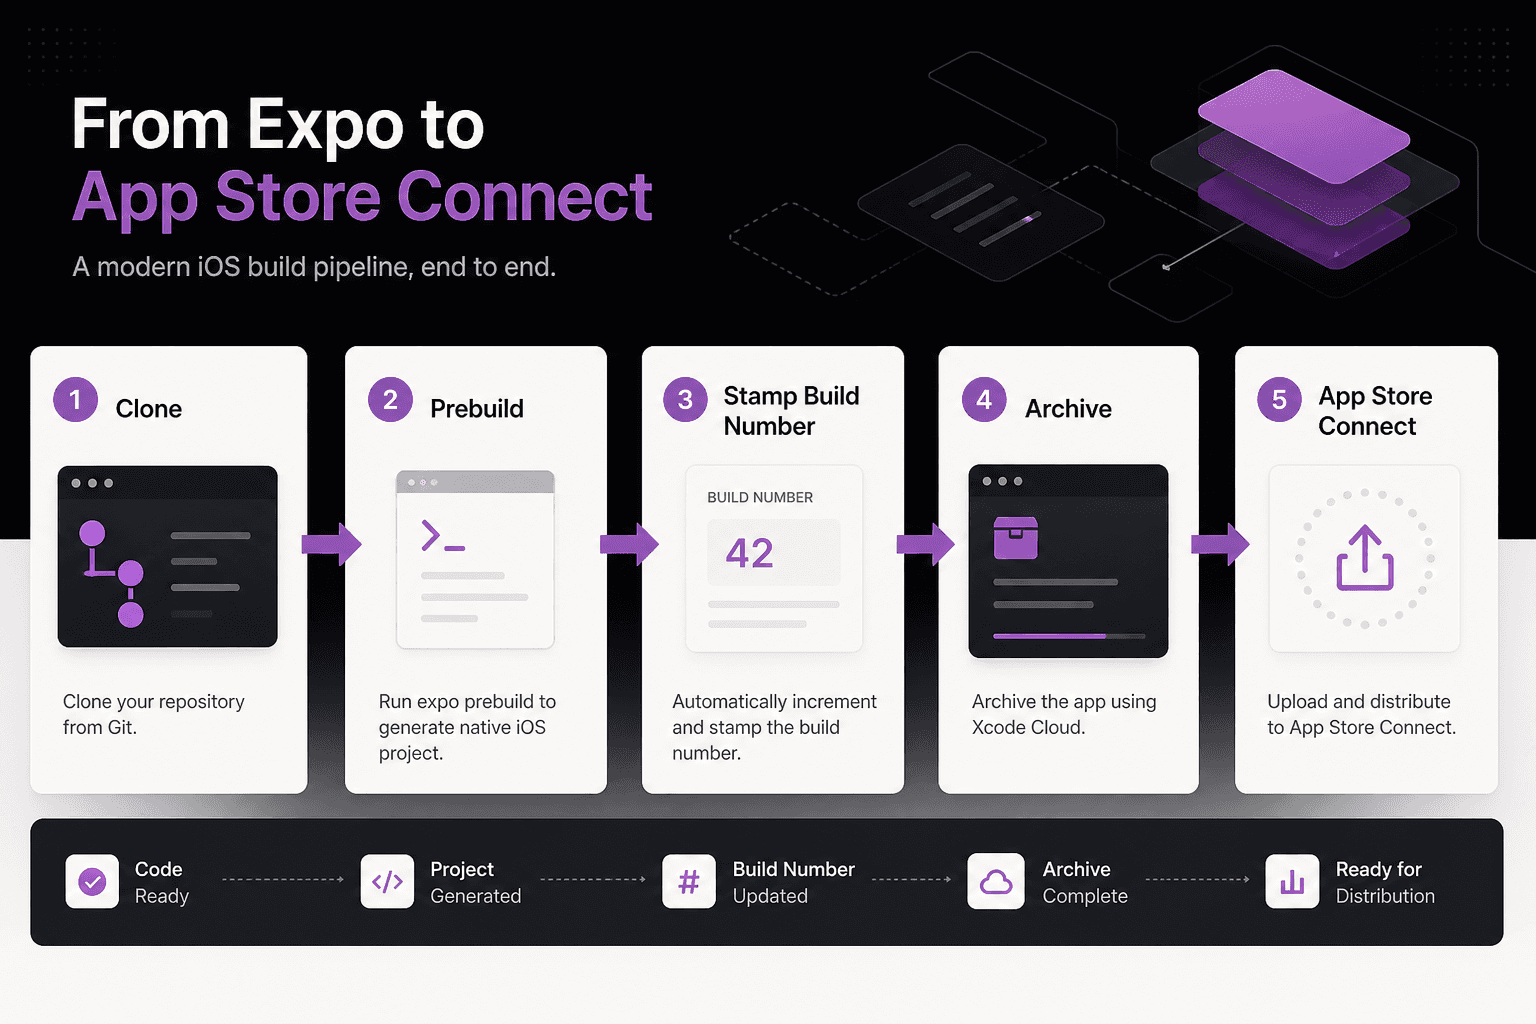
The release process in plain language
A few terms help explain the workflow:
| Term | Meaning in this guide |
|---|---|
| Build | A compiled version of the app |
| Archive | A release package Xcode prepares for distribution |
| TestFlight | Apple’s service for distributing test versions of an app |
| App Store Connect | Apple’s service for managing app listings, builds, and submissions |
| Continuous integration (CI) | Automatically running build or test steps after a code change |
| Prebuild | Expo’s process for generating native iOS or Android project files |
For Sisu, the sequence is: push a release branch, prepare the iOS project, create an archive, and send the build to TestFlight. Submitting that build for App Store review remains a separate step.
When Xcode Cloud is useful
Xcode Cloud fits teams that want to manage iOS builds and TestFlight distribution in Apple’s tools. It can also provide another way to build when a local machine has a toolchain problem.
You can continue using EAS Build alongside it. If two services produce releases for the same app, coordinate their build numbers so they do not upload conflicting versions.
For store releases, choose a supported macOS and Xcode build environment. We encountered an ITMS-90111 upload rejection while archiving from a beta macOS setup. Moving that build to a supported cloud environment resolved our problem. Treat the error as a reason to check the archive’s toolchain details, rather than assuming every rejection has the same cause.
1. Prepare the iOS project
Sisu generates its native iOS project from Expo configuration. We do not keep the full generated ios/ directory in Git, the system that tracks our source code.
Xcode Cloud needs that native project before it can compile the app. We generate it with a post-clone script, which runs after the service copies the repository. Apple discovers this script as ci_scripts/ci_post_clone.sh beside the project or workspace. See Apple’s custom build script guide for placement and execution requirements.
Our repository has two parts:
ios/ci_scripts/ci_post_clone.sh: A small launcher tracked in Git.xcode-cloud/ci_post_clone.sh: The main setup script, stored outside the generated iOS directory.
The setup script performs these steps:
- Move to the repository root using Xcode Cloud’s repository-path setting.
- Make the required Node.js and CocoaPods versions available. Node.js runs the JavaScript tools; CocoaPods installs native iOS dependencies.
- Install the project’s dependencies with the package manager and lockfile used by that repository.
- Set the build number if the project uses the scripted option described below.
- Run
expo prebuildto generate the iOS project. - Restore the launcher if clean generation removed it.
- Ensure the generated workspace has its CocoaPods dependencies installed.
The launcher needs restoring because prebuild --clean recreates the ios/ directory. Keep the main script elsewhere so it survives that operation. Expo describes this behavior in its native project generation guide.
Create the workflow once from Xcode
In Sisu’s repository, our prebuild:ios script generates the project and restores the launcher. This is a project-specific helper, not a default Expo command:
npm run prebuild:ios
open ios/*.xcworkspace
From Xcode, use Product → Xcode Cloud → Create Workflow. Select your app product; for us, that is Sisu. Avoid selecting a dependency target by mistake. Connect the repository and confirm that a cloud build can find the generated workspace before relying on the workflow for releases.
If your app maintains native iOS files directly, adapt this setup to preserve them. A clean prebuild can remove manual changes inside the generated directory.
2. Configure build settings and secrets
Environment variables are named settings supplied to the build, such as the address of the app’s server. Configure them in the Xcode Cloud workflow editor in Xcode or App Store Connect.
Separate settings that ship inside the app from credentials used only by the build process:
| Setting | Example | How to handle it |
|---|---|---|
| Public server address | EXPO_PUBLIC_API_URL | Expect users to be able to read it |
| Public client key | An analytics or subscription client key | Use only keys the provider intends for mobile apps |
| Build-service credential | An error-reporting upload token | Store as a secret and keep it out of the app bundle |
| Build-number setting | IOS_BUILD_NUMBER | Use only if your script reads it |
Marking a value as secret in the build service does not make it private inside the app. Expo includes referenced EXPO_PUBLIC_* values in the app’s JavaScript code. Never use that prefix for private credentials. See Expo’s environment-variable guide.
The variables needed by prebuild and by the JavaScript packaging step must be available when those steps run. After changing a value that is embedded in the app, build a new version and check the result.
3. Choose one way to assign build numbers
The app’s visible version, such as 1.0.7, and its build number, such as 41, serve different purposes. You may create several builds while preparing one app version. Apple uses the build number, stored as CFBundleVersion, to identify those uploads.
Our first generated project used build number 1, which did not match the release history we needed to continue. To avoid conflicts, choose one system to assign the number.
Option A: Let Xcode Cloud manage it
Use Xcode Cloud’s build-number management and set the next number above the builds already uploaded for the release. Confirm the number on the resulting archive. This keeps the counter in the build service.
Option B: Set it before Expo prebuild
Have your setup script write expo.ios.buildNumber in the app configuration before generating the native project. Our approach can use an explicit number or add a configured base to Xcode Cloud’s run number:
Explicit setting: IOS_BUILD_NUMBER = 41

Or calculate:
IOS_BUILD_NUMBER_BASE = 40
CI_BUILD_NUMBER = 1
Resulting build number = 41
These are settings for our script, not built-in Expo behavior. If the script controls the number, disable automatic replacement during archive distribution so another system does not overwrite it.
Coordinate with EAS Build
If you also use EAS remote version management, update its stored iOS build number to match your release plan. The command is interactive:
eas build:version:set --platform ios
Follow its prompts to select the profile and set the number. Then account for any automatic increment configured on the next build. The EAS CLI reference documents the command’s supported options.
4. Trigger builds from release branches
Our Xcode Cloud workflow starts when we push a branch matching release/*. This lets developers choose when to prepare a store build.
For example, after preparing version 1.0.7 and build 41, we create and push a release branch:
git checkout -b release/1.0.7-41
git push -u origin release/1.0.7-41
In this setup, the push starts the build. The branch name is a label for people; it does not set the app’s version or build number. Those must already be configured using the chosen numbering method.
We also disable automatic cancellation for this release workflow. That keeps a later push from cancelling an earlier queued release build. Choose the cancellation behavior that matches your team’s release process.
5. Prepare a build that can reach the App Store
When configuring the Archive action, select the deployment preparation option that supports App Store distribution. Then add a TestFlight post-action to distribute the build to the selected testers.
An archive prepared for internal testing only cannot be submitted to the App Store. A successful upload to TestFlight does not establish App Store eligibility. Apple explains the distinction in its distribution guide.
For Sisu, we check three separate outcomes:
- Xcode Cloud successfully creates the archive.
- App Store Connect processes the build and makes it available for the intended testing or release purpose.
- A person installs the build and checks the app’s main functions.
Store metadata, in-app purchases, and App Review submission have their own requirements. A successful archive does not complete those tasks.
Common problems and what to check
| Symptom | What to check |
|---|---|
Apple rejects the archive with ITMS-90111 | The Xcode, SDK, and operating-system details used to build it |
| A TestFlight build cannot be selected for App Review | Whether it was prepared for internal testing only |
| The build number is wrong or already used | Which system assigned it and whether another step overwrote it |
| A queued release build disappears | The workflow’s automatic cancellation setting |
| Xcode builds the wrong product | The selected app target and scheme |
| The app connects to the wrong server | The workflow’s public configuration values |
| The post-clone launcher is missing | Whether clean prebuild removed it and the script restored it |
We also encountered apps that compiled successfully but opened to a blank screen in TestFlight. Causes included translation setup, navigation behavior, and a missing native class. Those were runtime problems, which means they appeared when the app ran rather than when it compiled.
Before release, install the actual build, open the main screens, and test key actions. For Sisu, that includes opening a lesson and playing its audio.
Frequently asked questions
Does Xcode Cloud replace EAS Build?+
It can replace the iOS build part of your workflow, or run alongside EAS Build. If you use both, coordinate configuration and build numbers.
Must we commit the whole ios folder?+
Sisu’s setup regenerates it during the build and tracks a small launcher separately. That approach requires a working post-clone setup and configuration that can recreate the native project.
Why did a cloud build succeed when a local archive failed?+
The two builds may use different operating systems, Xcode versions, or other tools. Compare their build environments and the details of Apple’s rejection message.
Why can testers install a build that we cannot submit for review?+
A build prepared for internal testing only is restricted to that purpose. Create a new archive with App Store distribution enabled.
Pair the build workflow with our App Store screenshot process to prepare the listing for the same release.
xcode cloud
expo
eas build
app store connect
react native ios
testflight
sisu